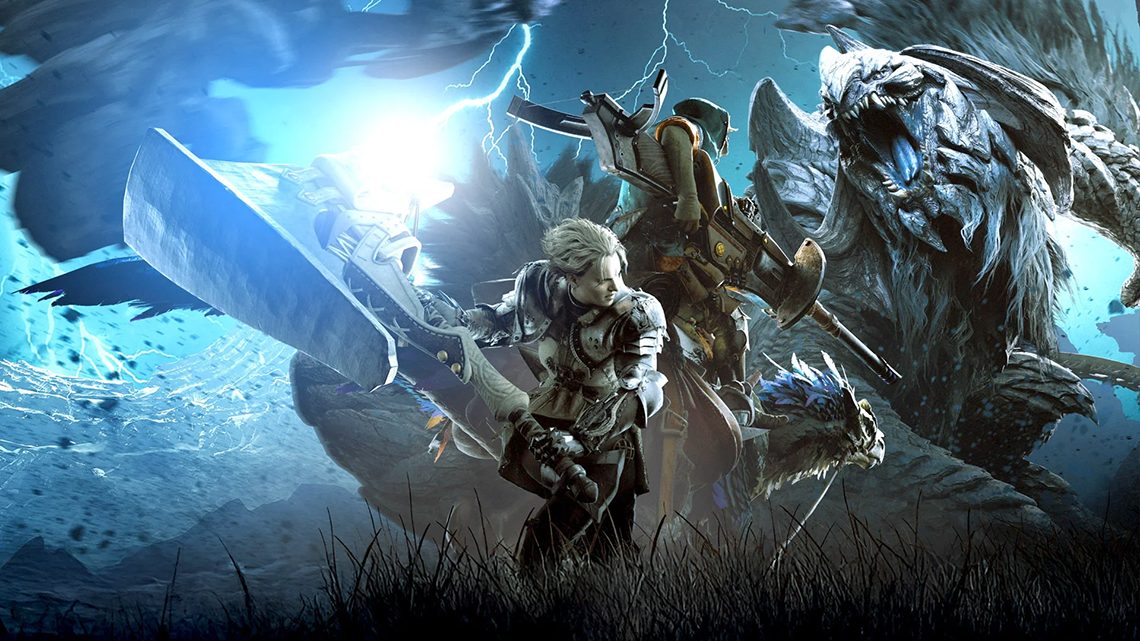
Monster Hunter Wilds offers many opportunities to play with other players. Whether in open quests, connection groups, or open lobbies, there are many ways to meet new players and go hunting with them. But what if you want to play with returning players or a fixed group? That's where hunting groups come in. Adding Squads We work with a dynamic hunting group in the stream, which means that we kick members out after each stream so that those who find each other in a stream can play together, and there are often over 50 members. You definitely need a hunting group so that you can join the hunting group lobby. In your options menu, go to the third tab. Options and navigate down to " Manage Squads " - Here you go to Add New Squad. There you select " Search for Squad ID " - Our current hunting group ID is " 3E4BY5E7 ". Join the lobby Once you have joined the hunting party, you can join via Alma or the quest counter in the lobby. At the quest counter, switch to the last tab. " Change lobby Menu " - there you choose Lobby-Search and afterwards" Lobby Search ". After that, the hunting group lobby should be selectable and you can join the quests.
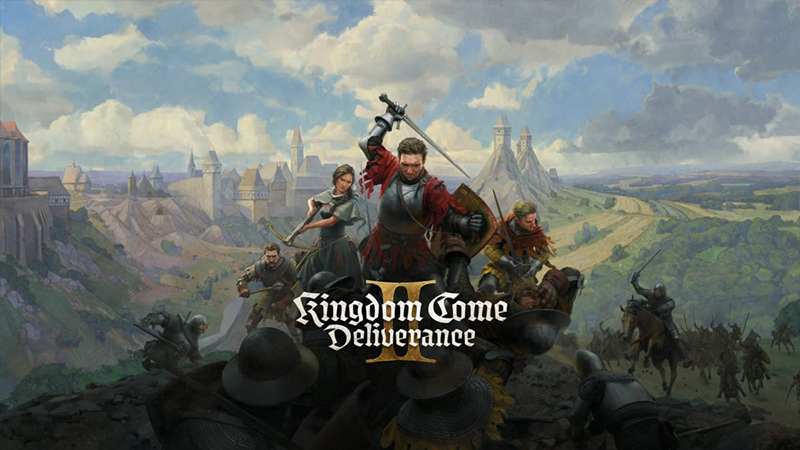
Getting a sword can be relatively difficult in Kingdom Come Deliverance 2. Good for us, you can get one of the best swords early in the game. In the start area of the village "Tachov" the smithy will give you a task to get a task to forge a very strong sword. This quest is available after some progress in the marriage quest. Keep asking the smithy what is going on and eventually you will get this quest. You will receive the quest from Aranka in the Normad's Camp, west to Zhelejov. She will ask you to forge the sword and will give you most of the materials for it. The quest is called "The Voivode's Curse (Der Fluch des Woiwoden)". All the materials can be bought from the smithy in the camp, the only additional material you will need is deer skin (Rehleder). Once you complete the crafting, tell Aranka that you were not able to forge the sword. The quest will be ended and you can keep the sword. In case you handed the sword over first, you are able to pickpocket the sword later on from her, but she will recognize the sword if you carry it around. Tags: kingdomcomedeliverance2, guide
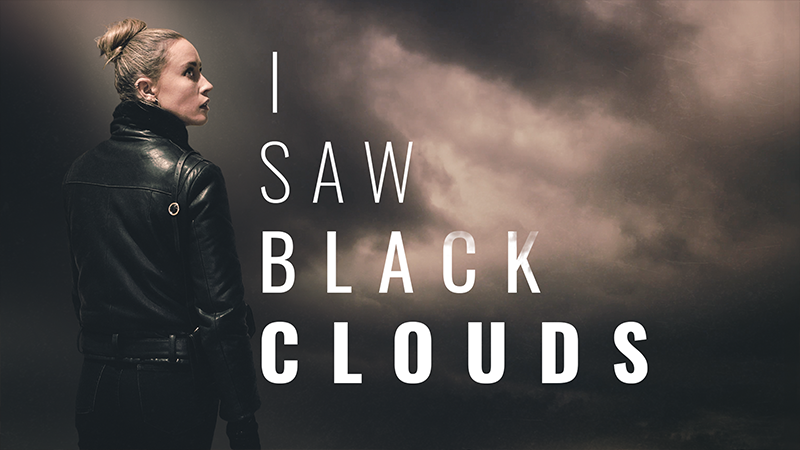
Du bist Kristina, eine junge Frau, die mit den Umständen des Verschwindens einer ihrer besten Freundinnen - Emily - zu kämpfen hat. Was war wirklich mit ihr geschehen? Was hat die Handlungen beeinflusst? All das kann man in dem interaktiven Psychothriller I Saw Black Clouds herausfinden. Believer Trophy, Nonconsensual Trophy Avoid No Find the necklace Wrap up the necklace Read more Go for a run Hold it in Emily’s journal I’ll stay Say nothing Getup Open the door Switch on the light Don’t move Answer it I’m not here for help I don’t need help She talked about you I need answers Yes Keep them open Nowhere is safe Forest Say nothing No Say nothing I don’t know No They’re dead Check on Dominique (Believer Trophy) Emily as a troubled person Something else Agnes? Didn’t anybody help her? What did she do? Suicides Advisory? Why did the clinic close? Anything else? Do you live here on your own? Coincidence (Origin Trophy) Did she come back? Emily Go left Left door Leave Look Ghost See Alexander Thank you Ask for help Confront Go upstairs Photo album Wardrobe Chest of drawers Drawers (Nonconsensual Trophy) Yes She was desperate Yes No Keep walking Yes Look upstairs Look at files Get out of here Look up Look down Reassure That felt real Suicide? Ghosts? No Maybe Ignore her Maybe Yes Look out the window Wait Runaway What happened? Try to get free Passive Keep quiet Look around Pick up metal bar Leave her Say nothing I could have done more Disagree (End Trophy) Realist Trophy, Wrong Trophy, Jack Trophy, Tough Trophy, Escape Trophy Avoid No Find the necklace Wrap up the necklace Read more Go for a run Let it out Go back to the apartment I’ll stay Emily! Get up Open the door Hello? Close the door Ignore it I’m not here for help I don’t need help She talked about you Why did she end her life? Yes Close your eyes Forest I saw a ghost No Say nothing No No They make me angry Check on Dominique (Realist Trophy) Keep walking Look back Challenge Say nothing Say nothing So? That’s ridiculous That’s stupid Amused Emily’s death Challenge Emily’s journal Clinic staff Sympathise Go left Left door Leave Look Look (Wrong Trophy) Stay Hidden Left Masked man What else do you know? Where? How do they know that? Hikers? Erm… Dismissive Something memorable? Poor guy Watch the video again Err? Lie A teacher Shut up Get out of there Stand your ground Fuck off! Up the stairs Cupboard Desk Drawers Sometimes Sarah Insist Jack Look upstairs Listen Hide Windows Back stairs (Jack Trophy) Look around downstairs Look at files What just happened? Say nothing Try to get free Speak to her quietly Keep quiet Fuck you Me Aggressive Find a weapon Right room Reassure her Listen Knock him out Balls Get out of there Get the other guy Get him (Tough Trophy) Hit with wood Punch face Get out Main Stairs Keep going (Escape Trophy) Reassure That felt real Ghosts? Suicide? Sceptical No Maybe Ignore her Maybe Yes Where are we? Look out the window Runaway That hurt Let us go! Passive Keep quiet Look around Wait Look around Pick up the metal bar Leave her Say nothing I could have done more Disagree Clear Trophy Not recently Maybe Find the necklace Wrap up the necklace Read More Go for a run Let it out Emily's journal I'll stay Emily! Listen Get up Open Door Hello? Close the door Answer it Emily's death She talked about you I need answers Yes Close your eyes I saw a ghost Yes Then how did I see one Yes Yes I love them Check on Dominique Emily was a troubled person Ghosts Something else Agnes? What did she do? Suicides Advisory? Rev'd Peter The Curse Do you live here on your own? Follow you? Have you seen her? Fire? Was she seen in the village again? Emily Straight ahead Left Door Keep Looking Look Ghost See Alexander Thank you Ask for help Confront Check on Charlotte Photo album Chest of drawers Look behind chest of drawers Yes She was desperate Yes Which part? Stop and listen Go back to Charlotte Yes Look upstairs Look at files Look for Charlotte Look up Look down Reassure That felt real Suicide Why did I see you? Amused Yes Maybe Yeah I'm fine Maybe Yes Where are we? Stop the car Stop the car Go to the building What happened? Let us go Aggressive Keep quiet Get free Look around Pick up metal bar Leave her left her behind I could have saved her Disagree Unfinished Trophy Avoid No Forget it, leave. Read more Go for a drink I’m leaving Say nothing Get up Open the door Switch on the light Close the door Ignore it I’m not here for help I don’t need help Why did she end her life? No What? Keep them open Forest Go right Right I saw a ghost Yes Then how did I see one? No Yes I love them Check on Dominique I want to understand what happened Something else Say nothing Agnes? Didn’t anybody help her? Say nothing Suicides Emily’s Journal Rev’d Peter Have you seen her? Fire? Did she come back? Say nothing Straight ahead Left door Leave Look Say nothing See Rev’d Peter Emily’s death Say nothing Agnes Her father Ask for help Confront Go upstairs Photo album Wardrobe Look behind the chest of drawers Maybe She was selfish No No Keep walking Cautious No Look upstairs Go downstairs Get out of there Look down Keep going Encouragey Interpret Trophy Not recently Maybe Forget it, leave Read more Go for a drink I'll stay Emily! Listen Get up Open the door Switch on the light Don't move Ignore it I'm not here for help I don't need help! She talked about you I need answers No What? Close your eyes Forest I saw a ghost Yes Then how did I see one? Yes Yes I love them Check on Dominique I want to understand what happened Something else Say nothing Agnes? What did she do? Haunted Emily's journal Rev'd Peter Have you seen her? Fire Did she come back? Say nothing Straight ahead Left door Leave Don't look Ghost See Alexander Thank you Ask for help Lie She's not coming back Check on Charlotte Drawers Chest of drawers Look behind chest of drawers Maybe She was selfish Yes No Stop & Listen Go back to Charlotte Yes Look around downstairs Go downstairs Look for Charlotte Look down Keep going Reassure Help Trophy Not recently No Find the necklace Leave Read more Go for a drink I’m leaving Emily! Get up Open the door Hello? Don’t move Answer it Emily’s death Why did she end her life? Yes Close your eyes Forest I saw a ghost Yes Say nothing No I don’t know They make me angry Look in entrance hall Keep walking Hide Aggressive It looked like you were Sceptical Say nothing So? That’s ridiculous That’s stupid Amused Emily’s death Challenge Emily’s journal Photo Sympathise Straight ahead Left door Leave Stay hidden Left Masked man What else do you know? Where? That’s the only time anyone’s seen him? Dominique Something memorable Poor guy Watch video again Err...? Lie Emily Shut up Get out of here Stand your ground F—k off! Back corridor Right bedroom Sometimes Emily Ask for help Jack Look upstairs Listen Back stairs Look upstairs Look at files What’s just happened? Who’s there? Look Keep quiet Keep quiet Me Keep quiet Denial Trophy Avoid Maybe Forget it, leave. Look at photo Go for a run Hold it in Go back to the apartment I’m leaving Say nothing Listen Go back to sleep I’m not here for help I don’t need help She talked about you I need answers No What? Close your eyes Forest Go left Left Left Say nothing No Then how did I see one? No Yes I love them Check on Dominique Keep walking Hide Aggressive It looked like you were Sceptical Say nothing So? Anything else? That’s stupid What a creep Emily’s death Challenge Advisory? Photo Leave Ignore Straight ahead Left door Leave Stay hidden Left Say nothing Say nothing Where? That’s the only time anyone’s seen him? Dominique Holidays? Poor guy Find Sarah Err...? Lie A teacher Shut up Get out of there Stand your ground F—k off! Back corridor Right bedroom Sometimes Emily Ask for help Jack Look upstairs Listen Back stairs Look around downstairs Go downstairs What just happened? Say nothing Keep quiet Aggressive F—k you Me Aggressive Find a weapon Right room Find a way out Get back to Charlotte Knock him out Face Get out of there Charlotte Go right Keep going Encourage