 smashthebunny
DEEN
smashthebunny

It's finally happening: Dune Awakening is coming to consoles at last, and its latest update brings a big DLC pack along with it, so PC players get their money's worth too. However, getting started in Dune Awakening can be truly brutal. The planet Arrakis is hot, water and other resources are terribly scarce, and sandworms are lurking everywhere, waiting to turn you into worm food.That's why this very simplified Dune Awakening starter guide gives you the most important tips to make your start in Dune Awakening much easier, shows you where to build a good starting base, and how to survive sandstorms and sandworms. You won't find any spoilers here. We don't want to give away what comes when, or what might come.Whether you've just arrived on Arrakis or are returning with the new update and the console release: with these little basics, the start is a whole lot easier.Every beginning is hardRight at the start, you'll encounter two dangers that can cost you your life straight away: sandstorms and sandworms. Both appear very quickly, and if you don't get to safety in time, there's no escape.SandstormImageStatusDescriptionUnshelteredThe normal status when you're moving freely through the world. Here, the sandstorm can reach you at any time.EnclosedIn this state, you're still outside, but the sandstorm can't actively reach you, and you should survive it unharmed. Vehicles are safe here too. This status can sometimes be reached in small rock crevices when seeking shelter.ShelteredIn this state, you are protected, but vehicles are still at the mercy of the sandstorm. This status is often reached in hideouts or small buildings. Small rock ledges can also trigger this status.Water-sealedNot relevant for the start of the game, but only once you've built a base. In a water-sealed shelter, both you and your vehicles are safe.SandwormWhenever you walk across open sand that isn't close to rock formations, a sandworm can appear. They are enormous and attack as soon as the vibration in the sand increases, or as soon as you approach a spice vein. These can be recognised by their purple haze. An imminent worm attack can be spotted via the vibration indicator at the bottom centre of the screen. The closer the worm is, the more sensitively it reacts to vibrations. Running or moving vehicles amplify the vibrations considerably.ImageStatusDescriptionNo vibration indicatorThe worm is not nearby and doesn't react to vibrations.Yellow-golden vibration indicatorThe worm is nearby and reacts to movement. Keep an eye on the indicator and the map so you can seek shelter if necessary.Red vibration indicatorThe worm is close and an attack is likely very soon. It's time to get to safety.Where do I go?Right at the start of Dune Awakening, you'll be dropped in the middle of the desert - more precisely, in the southern Hagga Basin. This is the starting area for all travellers. This is where the tutorial and the game's first introduction begin, and with them the question: where do I actually need to go? If you can't get your bearings at all at the beginning of Dune Awakening and have no fun setting up a little spot here and there before moving on to the next, you can play it safe with this point on the map. We've marked the red dot for you, which is the safest place to farm, explore, and get to know the game early on. It's located at the foot of the first outpost and is relatively easy to reach if you move from rock formation to rock formation.There are no coordinates in Dune Awakening, but you can tell fairly well where you are on the map by the outlines of the rocks.Your first little homeThe new DLCs offer plenty of protection to escape the first sandstorms, but a small 4x4 or 6x6 hut will do just fine for starters - and you'll need one. Whether you want to store the items from your raids or quickly seek reliable shelter from a sandstorm: a shelter is a must. The tutorial for it appears at the start, right after a few exploration missions and the first small crafting quests.So first build a functional roof over your head before you start building pretty.Drink, drink, drinkWater is one of the most important resources on Arrakis. Ignoring the water gauge can lead to death faster than sandstorms and sandworms combined.All over Arrakis, there are small patches of flowers that contain dew. Before you can build the first devices that collect water, these are your most important go-to source for the first few hours in the game. However, your water supply can only be filled up to the first marker if you drink the dew from the plants directly. That's why it's so important to remember where the most quickly accessible plants around your own base are.

Aniimo has finally launched in a big way—worldwide and on all platforms. Everyone’s talking about this free-to-play game right now, but there are some voices that are dampening the fun right from the start. We’ll set the record straight: What should you keep in mind as Aniimo launches? Is the game really a gacha game, and how much will it actually cost me? Frequently Asked Questions Is Aniimo free? Yes, Aniimo is a free-to-play game. Is Aniimo a gacha game? No, Aniimo isn't a traditional gacha game where you buy mystery items with random contents based on probability. If you want to spend money, you buy items that you actually receive. However, the game can also be played entirely for free. Are there any gacha elements in Aniimo? Yes, in the capital city, you can use in-game currency to play games of chance, including at a gacha machine. You don't have to buy the in-game currency, as you earn it through normal gameplay. However, you do have the option to purchase additional in-game currency. Is Aniimo a “pay-to-win” game? No, Aniimo offers pay-to-progress options that allow you to gain experience or currency more quickly, or to purchase in-game currency; however, it is not possible to purchase exclusive content that cannot be obtained by playing the game. For example: You can obtain new, high-quality, and rare Aniimos by hatching eggs, catching them, or earning them through gameplay. With real money, you can reduce the hatching time, but you cannot purchase rare Aniimos. Can you play Aniimo completely for free? Yes, Aniimo can be played completely for free. There is no content that can be unlocked exclusively by paying. The only difference is that your playtime is extended when you play completely for free. What daily rewards and limited-time activities are available? In the game Aniimo, there are several events that offer login bonuses to encourage daily play. These include, among other things, materials for catching Aniimos, items that can be used to level up and strengthen Aniimos, and portable incubators that allow you to hatch Aniimo eggs faster even when you're on the go. Is Aniimo PvE or PvP? Aniimo is a PvE-based game, but there are some missions—such as the “Egg Heist”—in which you fight against other players and NPCs at the same time while trying to get your hands on valuable eggs from which Aniimos will later hatch. Is there cross-play and cross-progression? You can team up with players on other platforms to complete missions. However, missions and achievements only count for the person who sends the invitation; the invited player receives neither rewards nor bonuses. Additionally, in co-op mode, only two Amiibo can be used per person instead of four. The game features cross-progression and cross-save, meaning you can play on a PC, save your progress, and later continue playing with the same save file on consoles or a smartphone. On which platforms is Aniimo available? Platform Status PC Available PlayStation 5 Available Xbox Available iOS September 23, 2026 Android September 23, 2026

Are you looking for the right selling prices for relics in Moonlighter 2: The Endless Vault? In this price list, you’ll find the current prices for all relics—from inexpensive finds to legendary relics. The table shows you the low price, the perfect selling price, and the high price. This way, you can quickly sell your relics in the shop at the best possible price and earn as much gold as possible.Prices are sorted by biome and rarity. Use this overview to search for a specific relic or look up the perfect price for a find.Kalina RelicsKalina is the first area you start in when you begin Moonlighter 2. Here is a list of the relics, sorted by rarity.Kalina - CommonReliktNameNiedrigster PreisPerfekter PreisTeurer PreisSilence Shell172124Sand Fruit263136Firewood344248Starsign Summoner425260Taaliks Map556878Sun Claw7289102Kalina - UncomminReliktNameNiedrigster PreisPerfekter PreisTeurer PreisBlackstone94115132Eclipse Flower123152174Brood Charm136168192Night Seed149184210Scorch Flower166205234Sun Bulb178220252Mother's Gift212262300The Song of the Guest234289330Mother's Call246304348Blob Shell272336384Old Armor289357408Mother Figure310383438Heretic Dagger327404462Lost Brother348430492Chosen's Necklace370457522Kalina - RareReliktNameNiedrigster PreisPerfekter PreisTeurer PreisSacred Spade425525600Fatzher's Honor438541618Mother's Blessing442541618Sun's Mimic463572654Mother's Patience468578660Necklace of Reunion538698789The Song of Welcome565698789Broken Promise586724828Father's Trophy612756864Beat Brew646798912Sun's Joy676835954Starsign Toy7108771002Cursed Flame7489241056Twilight Blossom7659451080Starsign Charm7959821122Kalina - EpicKalina - Legendary
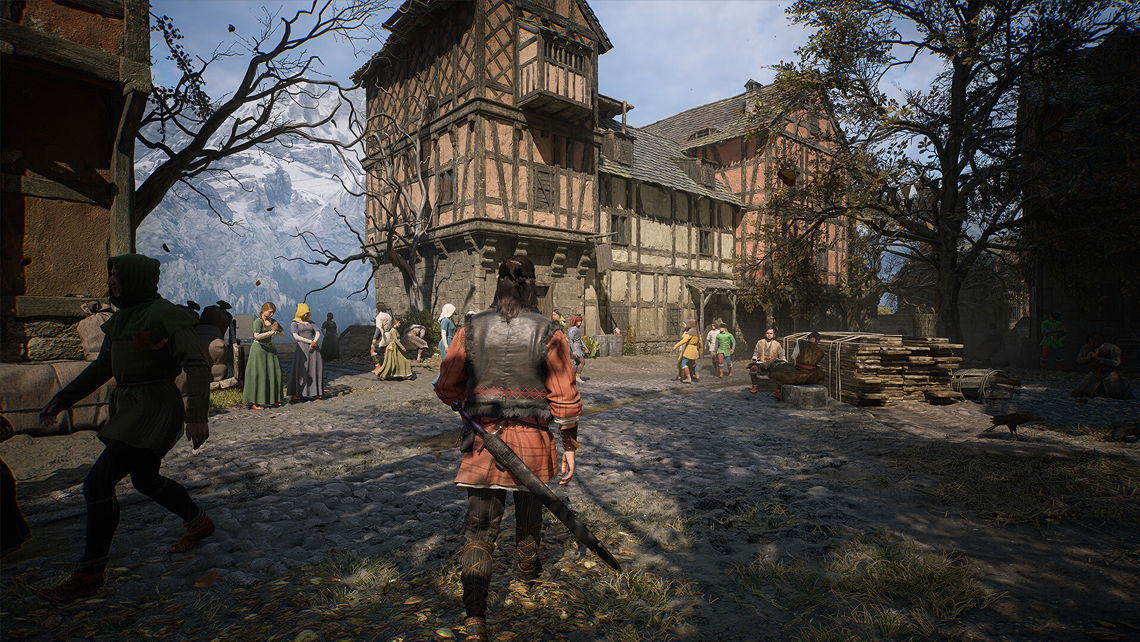
The Blood of Dawnwalker finally hits its release day today, September 3rd. To make sure you're properly prepared to master the game, we've put together some information that makes getting started easier, explains how the game's time management works, and helps you find your footing quickly right from the start. The Most Important Things First How difficult is the game's time management? Time management is easier than the press and some creators make it out to be. The principle is explained further below. There's only a certain number of quests you can complete per day, and special abilities cost time as well. Which difficulty level is recommended? If you want to complete the game 100% in a single playthrough, you'll have to play on the highest difficulty, Duelist. This difficulty grants an achievement, though that achievement can also be earned in a later playthrough. Is there a lot you can miss? Yes — there are 19 quests in total that are flagged as missable. That includes the game's main objective. To avoid spoilers, we'll cover this in a separate guide. Let us know in the comments if you need specific information about it. Time Management The Blood of Dawnwalker introduces an interesting new gameplay mechanic: time management. Many abilities cost time. We already know this from quest systems where certain quests consume time. What's new is that some abilities from the skill tree also make time pass faster. You have to budget your time well in order to get through everything you set out to do. Some quests are time-critical, but the game points this out. You'll get a message telling you not to ignore a quest for too long, since doing so has consequences or causes the quest to fail. In the screenshot above you can already see that the golden time value in the bar at the bottom shows how much time has passed so far. The grey time value shows how much time the selected quest would consume.
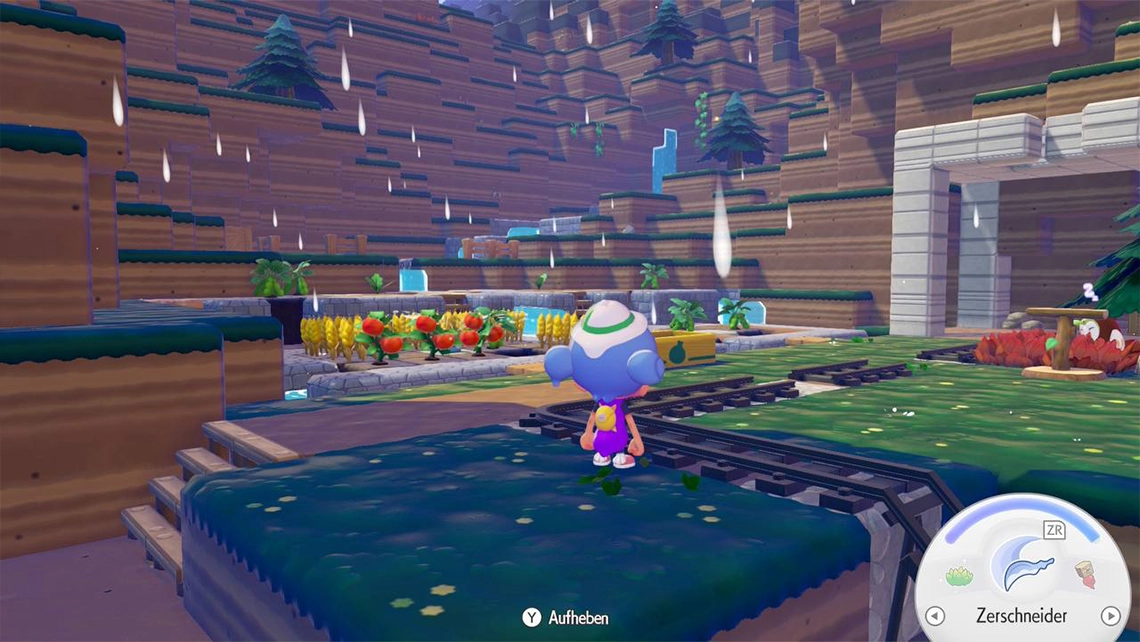
The environment level in Pokémon Pokopia determines which items, challenges, and progress you unlock. You increase it mainly by attracting new Pokémon and raising their comfort level. In this Pokopia level guide, we'll show you every method and upgrade to quickly bring your environment level to level 10 and unlock all items and recipes. Pokémon Pokopia Environment Level – Quick Overview Maximum level 10 Each area has its own environment level Higher levels unlock furniture, recipes, and buildings Increases through Pokémon comfort and new residents Overview Increasing the environment level Frequently asked questions (FAQ) Environment level rewards per area How can you increase the environment level quickly? In short: the more Pokémon you have living in an area, the less high their satisfaction needs to be individually. To keep increasing your area's level regardless, it helps to meet the Pokémon's needs and fulfill their wishes. What helps to increase the environment level: Attract new Pokémon, build more habitats Increase the Pokémon's comfort level Place matching buildings and items Complete challenges and daily wishes (giving Pokémon berries is one of the fastest ways to fulfill daily wishes. In our berry guide, we explain every berry and its effects. ) What rewards are there for increasing the environment level? With every level reached in an area, the PC has new items and recipes in stock. You'll find out exactly which ones in this list below. Withered Wasteland In Withered Wasteland, you'll mainly unlock garden decorations. It's also where most of the inventory expansions become available. Level 2 Image Item Garden Bench Leaf Building Kits Log Bed Cup Mysterious Glasses Thin Candle Wooden Chair Workbench (Recipe) Level 3 Image Item Castform Weather Doll Leaf Building Kits (Recipe) Feebas Fountain Security Camera Building Blocks Tripod Twisted Potted Plant Wooden Tub Wooden Bed Arch Tiles (Recipe) Stacked Straw (Recipe) Woodworking Recipe Set (Recipe) Wooden Gate (Recipe) Level 4 Image Item Handcart Leaf Cottage Kit (Recipe) Mushroom Lantern Path PP Up Berry Baskets (Recipe) Community Chest (Recipe) Partition Wall (Recipe) Wooden Ladder (Recipe) Level 5 Image Item Fire Pit Leaf House Kit (Recipe) Pink Cottage Kit (Recipe) Dark Roof Recipe Set (Recipe) Window with Shutter (Recipe) Magikarp Decoration Party Popper (Recipe) Floor Hatch with Flap (Recipe) Level 6 Image Item Poké Metal Bar Wall Mirror Diagonal Wooden Floor (Recipe) Floor Switch (Recipe) Garden Lantern (Recipe) Wall Mirror (Recipe) Level 7 Image Item Rare Poké Metal Bar Ditto Rug (Recipe) Garden Bench (Recipe) Garden Chair (Recipe) Painted Wall (Recipe) Level 8 Image Item Beautiful Park Building Set (Recipe) Garden Flowers (Recipe) Garden Table (Recipe) Simple Flooring (Recipe) Level 9 Image Item Berry Chair (Recipe) Berry Table Lamp (Recipe) Modern Wall (Recipe) Level 10 Image Item Berry Bed (Recipe) Berry Hanging Lamp (Recipe) Berry Table (Recipe) Berry Wall Decoration (Recipe) Polka Dot Print (Recipe) Bleak Beach In Bleak Beach, you mainly unlock beach furniture and resort furnishings. Level 5 is especially interesting here, thanks to the mini lock gate, which lets you control the water. Level 2 Image Item Beach Chair Beach Umbrella Table Lamp Sand Cabin Kits Play Hoop Birdhouse Brick Stairs (Recipe) Cash Register (Recipe) Plate (Recipe) Level 3 Image Item First Aid Kit Knitting Set Sand Cabin Kits Harbor Street Lamps (Recipe) Subtle Sofa (Recipe) Level 4 Image Item Pikachu Fountain Kit Subtle Cabinet Subtle TV Table Sand Cabin Kits Ship Railing (Recipe) Brick Wall (Recipe) Grate Flooring (Recipe) Subtle Lamp (Recipe) Level 5 Image Item Mini Lock Gate Orange Cabin Kit Sand Cabin Kits Sliding Window Washing Machine Brick Roof Recipe Set Modern Door (Recipe) Plastered Wall (Recipe) Sliding Window (Recipe) Washing Machine (Recipe) Level 6 Image Item Poké Metal Bar Brick Border (Recipe) Resort Hammock (Recipe) Resort Chair (Recipe) Soft Carpet Flooring (Recipe) Wall Switch (Recipe) Level 7 Image Item Rare Poké Metal Bar Resort Chair (Recipe) Resort Sofa (Recipe) Fabric Wall (Recipe) Poké Ball Mat (Recipe) Level 8 Image Item Stylish Café (Recipe) Dam (Recipe) Brick Border (Corner) (Recipe) Resort Bed (Recipe) Resort Table (Recipe) Level 9 Image Item Inflatable Boat Pikachu Sofa Cute Chair (Recipe) Cute Lamp (Recipe) Starry Sky Wall (Recipe) Level 10 Image Item Beach Pokémon Center Set Desert Pokémon Center Set Cute Bed (Recipe) Cute Dresser (Recipe) Cute Sofa (Recipe) Cute Table (Recipe) Gingham Wall (Recipe) Rocky Ridges In Rocky Ridges, you'll mainly unlock party supplies quickly, so you can throw parties in the area sooner. Rocky Ridges gets especially interesting at level 6, since the sensor lets you build great automations. Level 2 Image Item Standing Microphone Stone Bench Stone Cabin Kits Leftover Thread Stepping Stones Level 3 Image Item Balloons Wool Sparkling Water Moon Dance Statue Kit Stage Podium Stone Building Kits Iron Bed (Recipe) Party Wall Decoration Level 4 Image Item Party Cups Speaker Stone Cottage Kit Iron Plate Flooring (Recipe) Level 5 Image Item Gray Cabin Kit Refrigerator Stone House Kit Tablet Iron Door (Recipe) Iron Ladder (Recipe) Iron Stairs (Recipe) Refrigerator (Recipe) Stage Podium (Recipe) Level 6 Image Item Sensor (Recipe) Pretty Stone Flooring (Recipe) Level 7 Image Item Rare Poké Metal Bar Industrial Bench (Recipe) Industrial Desk (Recipe) Iron Wall (Recipe) Poké Ball Doormat (Recipe) Level 8 Image Item Concert Stage Kit Light Block (Recipe) Luxury Sofa (Recipe) Luxury Table (Recipe) Level 9 Image Item Luxury Chair (Recipe) Luxury Lamp (Recipe) Fluffy Wall (Recipe) High Striker Level 10 Image Item Rocky Ridges Pokémon Center Kit Luxury Dresser (Recipe) Luxury Bed (Recipe) Pretty Poké Ball Pattern (Recipe) Sparkling Skylands In Sparkling Skylands, the focus is mainly on unlocking pop art furniture and decorations. At level 6, the mini generator becomes interesting, letting you generate electricity automatically. And if you attract Porygon to the island, you can skip the power poles entirely, since that unlocks the conductor blocks. Level 2 Image Item Mailbox Office Chair Slide Asphalt Path (Recipe) CD Shelf (Recipe) Concrete Stairs (Recipe) Metal Fence (Recipe) Mosaic Tiles (Recipe) Level 3 Image Item Bathtub Newspaper Stand Small Office Cabinet Poké Mart Kit Pop Art Sofa CD Player (Recipe) Level 4 Image Item Newspaper Office Locker Concrete Cover (Recipe) Corrugated Metal (Recipe) Metal Smelting Furnace (Recipe) Wall Ledge (Recipe) Stone Fence (Recipe) Glass Pane (Recipe) Level 5 Image Item Game Boy Stone Fireplace Yellow Cabin Kit Game Boy (Recipe) Glass Window (Recipe) Plain Door (Recipe) Level 6 Image Item Poké Metal Bar Concrete Border Recipe Set (Recipe) Mini Generator (Recipe) Pop Art Bed (Recipe) Pop Art Chair (Recipe) Level 7 Image Item Rare Poké Metal Bar Pop Art Sofa (Recipe) Pop Art Table (Recipe) Rough Wall (Recipe) Level 8 Image Item Small Office Kit Pop Art Lamp (Recipe) Supermarket Flooring (Recipe) Level 9 Image Item Large Drum Gaming Chair (Recipe) Gaming Light (Recipe) Pokémon Center Wall (Recipe) Level 10 Image Item Sparkling Skylands Pokémon Center Kit Berry Pattern (Recipe) Gaming Refrigerator (Recipe) Gaming PC (Recipe) Palette Town Level 2 Image Item Large Storage Chest Eevee Plush Item Finder Level 3 Image Item CD Player Fishing Rod Pikachu Plush Counter City Street Lamp (Recipe) Level 4 Image Item Fan Light Wood Wall (Recipe) Level 5 Image Item Arcanine Plush Black Paint Blue Paint Light Blue Paint Green Paint Pink Paint Red Paint White Paint Yellow Paint Wall Monitor Tangled Cables Antique Bed (Recipe) Antique Chair (Recipe) Antique Table (Recipe) Level 6 Image Item Dragonite Plush Poké Metal Bar Antique Dresser (Recipe) Antique Sofa (Recipe) Level 7 Image Item Rare Poké Metal Bar Feraligatr Plush Antique Lamp (Recipe) Antique Dresser (Recipe) Antique Wall (Recipe) Safe (Recipe) Level 8 Image Item Ditto Plush Fountain Square Kit Antique Clock (Recipe) Antique Cabinet (Recipe) Sandstone (Recipe) Light Antique Wall (Recipe) Level 9 Image Item Poké Ball Light (Recipe) Poké Ball Sofa (Recipe) Photo Stand Stone Arch (Recipe) Light Brown Stone Arch (Recipe) Red Stone Arch (Recipe) White Stone Arch (Recipe) Yellow Stone Arch (Recipe) Level 10 Image Item Poké Ball Bed (Recipe) Poké Ball Dresser (Recipe) Poké Ball Wall (Recipe) Poké Ball Table (Recipe) F.A.Q Can the environment level decrease again? Yes, the environment level can decrease again if Pokémon lose their home, or if items belonging to that home are removed. Because of this, the environment level can even drop lower than it was before you placed an item. What is the maximum environment level? The highest environment level is currently level 10. How do I check the environment level? At the PC next to the Pokémon Center, pressing "-" lets you check the environment level. There you can also see the Pokémon's satisfaction. Which areas should you level first? It definitely makes sense to level all areas up to level 5, since that's required to complete the story. Leveling the areas further unlocks additional conveniences, though, like the sensor from level 6 in Rocky Ridges, which lets you build automations.

Anyone who has started playing Pokopia realizes fairly quickly that berries are essential. You can eat them, give them away, use them to cook meals, make dye from them, or have Mooslaxo use them to create various world effects. In this short guide, we’ve put together an overview of the different types of berries, where to find them, and the best ways to use them. What This Guide Covers Types of Berries Where can you find the berries? What kinds of dishes can you cook? What colors can be produced? What are the effects of Relaxo? Types of Berries Berries and Their Flavors Berry Name Taste Leppa Neutral Pecha Sweet Aspear Sour Chesto Dry Rawst Bitter Lum Neutral Where can you find the berries? Berries and Where to Find Them Berry Name Location Leppa By default, every player starts with this berry on the first island Pecha The seeds for the Pirsifberry tree can be found in Kargbergia on a small path off the Lava Lake, behind an obstacle. Apear In Bleack Beach, the berries can be found near a waterfall in the upper mountains Chesto Maronberry seeds can be found near Farbeagle's lair in Bleak Beach. Rawst In Sparkling Skylands, you'll find the berry seeds on the upper-left island; the berry is located in a passageway. Lum In Gimmighoul, his residence can be found in Rocky Ridges, near the museum. What kinds of dishes can you cook? Textblock What colors can be produced? Textblock What are the effects of Relaxo? Textblock

This Heart of the Forest Guide provides a complete walkthrough covering all decisions, endings, and achievements. Here, you'll learn how to play each scene to the best of your ability and unlock all possible story paths. You follow Anna and Laura as they go on a hike through Germany’s Black Forest with their friends Simon and Daniel. What begins as a peaceful outing for a group of students quickly turns into a dark adventure filled with the secrets that lurk in the Black Forest. You can play as each character in turn, and every decision you make influences the course of the game. With this guide, you’ll always make the right choices and are guaranteed to reach all endings. This guide was updated in March 2026.

Monster Hunter Wilds offers many opportunities to play with other players. Whether in open quests, connection groups, or open lobbies, there are many ways to meet new players and go hunting with them. But what if you want to play with returning players or a fixed group? That's where hunting groups come in. Adding Squads We work with a dynamic hunting group in the stream, which means that we kick members out after each stream so that those who find each other in a stream can play together, and there are often over 50 members. You definitely need a hunting group so that you can join the hunting group lobby. In your options menu, go to the third tab. Options and navigate down to " Manage Squads " - Here you go to Add New Squad. There you select " Search for Squad ID " - Our current hunting group ID is " 3E4BY5E7 ". Join the lobby Once you have joined the hunting party, you can join via Alma or the quest counter in the lobby. At the quest counter, switch to the last tab. " Change lobby Menu " - there you choose Lobby-Search and afterwards" Lobby Search ". After that, the hunting group lobby should be selectable and you can join the quests.
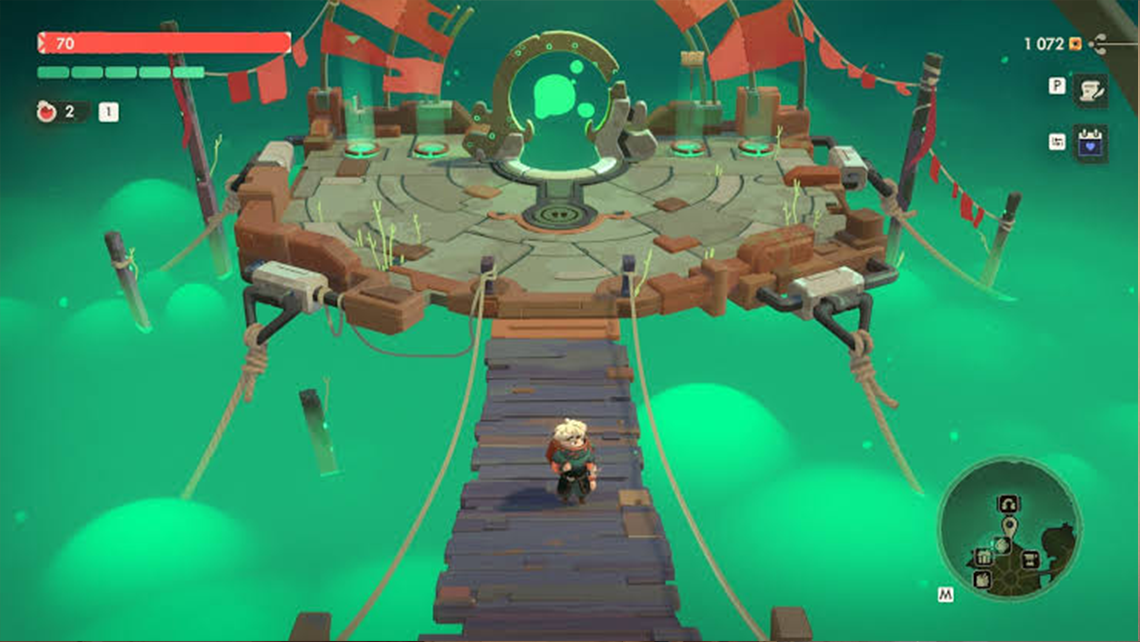
Moonlighter 2 has finally arrived in Early Access. Just like its predecessor, the second entry in the series revolves around exploring dungeons, gathering resources and items, and selling them to develop both your character and your own shop. The Basic Gameplay Loop So how does Moonlighter actually work? The key thing to understand is that virtually every move in Moonlighter follows a cycle that keeps repeating: Dungeon → Loot → Shop → Money → Upgrades → and back to the start Greed and Economy Of course, there's one small hurdle in the gameplay that makes the experience a little harder or a little slower: the limited inventory. We all know the feeling — you spot something small and shiny at the edge of the screen, and it simply has to be looted. In Moonlighter, though, you should think twice: do I actually need this item? Can I sell it at a decent profit? Which Upgrades Are Worth It First? When it comes to general playstyle and your choice of weapons, it always depends on personal preference. Still, a few things can be said in general terms to make the experience more fun and more rewarding early on. Survivability Inventory and shop improvements Weapons Those would be the first three categories I'd invest in. With weapons in particular I'd be careful at the start, since they play quite differently from the first game — and above all, the bow no longer counts as the all-rounder weapon it was in the predecessor. An Easy Start For a good start, it helps to spread the experience across your first few expeditions and only then start playing with a clear purpose. Use your first run to explore the dungeons, get to know the enemies, study their patterns, and collect resources. After that, start being more selective about your loot instead of picking up everything that drops. This is where you'll quickly turn your first profits in the shop. Then you'll be ready to improve your own gear, which leads to better loot, which in turn lets you expand your shop faster. And that's how you build your own little cycle that mirrors the game's cycle.
 Sign in with Twitch